July 5, 2014

Tutti i frutti cocktail


On our last trip up to NYC we found this amazing pizza place with fried pizza (I thought pizza couldn't get better- but it can!) and these amazing cocktails. The restaurant is called Don Antonio's if you are ever in New York! Since we live a little far away from New York we decided to try to recreate them. The Tutti i Frutti had tons of fruit on it and was delicious! 

Here is our interpretation: 

1-1 1/2 oz dark rum
3 oz simple syrup
3 oz fresh squeezed lime juice 
1 tsp maple syrup
Pineapple purée 
Top with seasonal berries (we used blueberries, blackberries, and raspberries) 

Chop or blend the pineapple until the desired consistency. Combine the rum, maple syrup, simple syrup, and lime juice  and shake with ice. Serve over ice and top with pineapple purée and berries. 

June 2, 2014

Pungo Strawberry Lime Sorbet

One of my favorite parts about spring is strawberry season. We go out to Pungo to pick strawberries every year. This strawberry lime sorbet is the perfect flavor combination, the slight tartness of the lime counterbalances the sweet strawberry. 

cups fresh strawberries pureed with 1/3 lime juice until smooth
cup granulated sugar
tablespoon vodka (I used unflavored, but feel free to experiment with various flavors, etc.) 
lime zest (about 1/2 - 1 tablespoon)

1. Pulse strawberries and lime juice in a food processor until smooth (if you want strawberry pieces in the sorbet do not pulse as long). Combine berry puree, sugar, lime zest and vodka in large bowl. Stir on and off for several minutes until sugar has dissolved. (Or, to speed chilling process in next step, combine ingredients in a metal bowl set over a larger bowl filled with ice water.) Rub finger along bottom of bowl to see if sugar has dissolved.

  1. 2. Pour mixture into small container. Seal and refrigerate until mixture is no more than 40 degrees. (If mixture has been stirred over a bowl of ice water, it may already be cold enough, and this step may be omitted.)
  2. 3. Pour chilled mixture into container of an ice cream machine and churn until frozen, about 20-30 minutes depending on your ice cream machine.
  3. 4. Scoop frozen sorbet into a container. Seal and transfer container to freezer for several hours to allow sorbet to firm up. (Sorbet can be kept frozen for up to 3 days.)

    The alcohol in the sorbet allows for a very creamy, smooth texture; however, the sorbet will never be very hard, even after freezing for several hours. 

April 26, 2014

Faux Bordeaux Candies


Our favorite candy company is See's Candies - but you can only buy it locally at certain times of the year. So we found a recipe and decided to try it out! This recipe is for faux Bordeaux candies, which is a brown sugar fudge covered with chocolate. The following recipe turned out quite well - I made a few minor adjustments to the original recipe I found that I personally think made it taste more closely to the real See's candy. 


1/4 cup heavy cream
1 cup brown sugar
1/2 cup salted butter
1/2 teaspoon instant coffee
1/2 teaspoon vanilla extract 
2 cups sifted powdered sugar
12 ounces chocolate (you can choose which kind of chocolate to use - dark/semisweet/milk, or do a variety) 
Chocolate jimmies

Melt the butter and brown sugar together in a heavy pan and stir to combine. Bring to a boil and boil for two minutes.

Use about a tablespoon of very hot water to dissolve the instant coffee. 

Stir in cream, vanilla and instant coffee and boil for another 30 seconds, stirring constantly. Remove from heat and let cool for 10 minutes. 

Add sifted powdered sugar to mixture and stir to incorporate. Chill mixture until it holds the shape of a small ball. 

After cooled, roll into 2-inch balls. Melt chocolate either in the microwave or in a double broiler and dip each candy in the chocolate. Cover with chocolate jimmies and let set - about 2 hours depending on the consistency of the chocolate. 

February 13, 2014

Cilantro and Lime Salad with Chicken


This salad is from the Nordstrom Cafe Cookbook. The salad is served in the Nordstrom Cafe and is one of my mom and I's favorite salads and we always make excuses to go out to Norfolk to get it! It is so fresh and delicious but very filling and satisfying. We've had the cookbook for a while but kept put off making it had home because it looked a little daunting because of the long ingredient list. We had an over abundance of cilantro so we knew that we had to make it- and it turned out to be pretty simple! We ended up making the vinaigrette a few days ahead and just kept it in the refrigerator and then assembled the rest of the salad the night we wanted to eat it. 

Chipotle-Lime Vinaigrette

1/3 cup rice wine vinegar
1/4 cup fresh lime juice
1 clove garlic, minced
2 teaspoons pureed chipotle chiles in adobo sauce
2 tablespoons honey
1/2 teaspoon kosher salt
3/4 cup canola oil
1 cup chopped fresh cilantro

3 ears corn, shucked and grilled or boiled
1 pound boneless, skinless chicken breasts, seasoned with salt and pepper, cooked and julienned
1 1/2 cups diced plum or cherry tomatoes
1 pound mixed baby greens
2 cups grated jack cheese
1/2 cup chopped roasted red bell pepper
kosher salt
freshly ground black pepper
3/4 cup toasted salted pumpkin seeds
fresh cilantro for garnish
lime wedges for serving

Chipotle-Lime Vinaigrette

In a blender or a food processor combine the vinegar, lime juice, garlic, chipotle chile, honey, and salt and process until thoroughly combined.  Gradually add the canola oil in a steady steam. Add the cilantro and pulse or process to combine. Taste and adjust the seasoning.

Lime and Cilantro Salad with Chicken

To assemble the salad, cut off the corn kernals from the cob (you can also you frozen corn if its off seasons! ). Add the chicken, tomatoes, greens, cheese, and bell pepper*.

Top with pumpkin seeds and fresh cilantro and serve immediately with vinaigrette.      

*To roast red pepper, roast over a grill or a gas burner, about 2-3 minutes on each side, turning once black marks appear. After roasted, let rest until cool, and then slice, deseed, and chop. 

February 9, 2014

No Knead Bread


This is the first time I've made this type of bread and it turned out great! It was super easy and surprisingly few steps! I would definitely recommend this to anyone who has been wanting to make bread but has been reluctant to do so because of the amount of time it takes. The no knead aspect of this bread allows for most of the work to be done over night and eliminated the second proofing, making it less difficult- but it is still a very tasty, crusty bread. 

I found the recipe for this on a blog called Simply So Good, she has great directions and tips. 

No Knead Bread

3 cups all purpose flour (good quality works best- like King Arthur) 
1 3/4 teaspoons salt
1/2 teaspoon Instant of Rapid-rise yeast
1 1/2 cups water

In a large bowl whisk together flour, salt, and yeast. Add water and mix until it comes together, it will not be neat/smooth, but don't worry. Cover the bowl with plastic wrap and set aside for 12-18 hours. Overnight works great because you can just go to bed and resume work in the morning.

This is what the dough will look like after resting for 12 hours 

Heat oven to 450 degrees. When the oven is preheated, place a cast iron pot with a lid (or any pot that will sustain 450 degree heat) in the oven and heat the pot for 30 minutes. While the pot is in the oven, turn the dough onto a well floured surface and shape into a ball. Make sure there is plenty of flour as the dough will be rather wet and sticky (and this is okay!). Cover the ball with plastic wrap and let rest while the pot heats. After the 30 minutes, remove the pot from the oven and drop the dough in, being careful, as the pot will be extremely hot. Also, be sure to keep the oven door closed as you are doing your dough transfer as to keep the oven at 450 degrees. Put the lid on and place in the over for 30 minutes. After 30 minutes, remove the lid and bake an additional 15 minutes. Remove the bread from the oven and place on a cooling rack. 


I wanted to try the bread plain for the first go round, but this bread lends itself to add ins such as nuts, fruits, herbs, and cheese. I think tomorrow I am going to try a Cheddar-Chive variation and a Dried Cranberry-Orange variation. I will post about how they turn out!  


There is nothing better than a slice of fresh bread with a bit of butter and some good jam! Now I can't wait for spring to roll around so that we can start making our own jams again! 


January 22, 2014

Vanilla Raspberry Lollipops


A cold, snowy day inspired me to finally try making lollipops. I was stuck at home (it did snow a fair amount, and I'm not too fond of driving in the snow/ice) and had all the supplies on hand. It ended up being relatively easy, as far as candy making goes! 


I modified a recipe from Martha Stewart

- lollipop molds (or a non stick mat such as a Silpat)
- 2 1/4 cup granulated sugar
- 3/4 cup water 
- 2/3 cup light corn syrup
- 3 drops raspberry flavored oil
- 1/4 teaspoon pure vanilla extract 
- food coloring, if desired
- vegetable oil to spray molds

If using lollipop molds, spray lightly with vegetable oil, making sure to get into all of the creases. If you are not using molds, just use a non stick mat such as a Silpat, no oil necessary.

Combine the sugar, water, and corn syrup in a heavy bottom saucepan, and place over medium-high heat. If sugar crystals start to form on the sides of the pan use a pastry brush dipped in cold water to brush down the sides. Use a candy thermometer and cook the mixture until it reaches 310 degrees, the hard crack stage. When using your thermometer, make sure it does not touch the bottom of the pan as that will skew the reading. 

Remove from heat, and pour sugar mixture into a heatproof measuring cup with a spout (anything that is heatproof and has a spout for pouring will do the trick, its just not really feasible to pour from the saucepan). Add the raspberry flavor, vanilla, and food coloring if desired and stir with a wooden skewer or chopstick. Pour immediately into the molds or onto the Silpat in circles of desired size, then immediately place lollipop sticks into sugar. 

**If you have never worked with hot sugar before, I would recommend enlisting the help of a friend to place the sticks as you move onto the next lollipops. The sugar mixture will cool rather quickly, so it is crucial that you work quickly and efficiently. Another way to help manage your time is to make sure that you have all of the items you will need set out in advance before you start. 


Afternoon Tea

It's always been a tradition to have tea, whether for special occasions, while exploring other cities, or just at home with family and friends. My best friend, Gabby, will soon be going back to Indiana, where she is in a PhD program for Classical Studies, so I wanted to have tea before she left. 

On the menu was Pistachio Raspberry cupcakes (I made minis this time because there were a few other items, but I think the concensus was we prefer the regular size ones), cream scones, and currant scones. 

My sister Emily helped me make the scones and we had a variety of loose tea - English breakfast, blueberry, and apricot! 


Here are the recipes for the two scones. The cream scones are smaller, but you could cut the currant scones into rounds instead of triangles if you wanted them to be smaller as well. 

I like to serve my scones with lemon curd, raspberry preserves, and Devanshire cream. 

January 8, 2014

Dimple Stitch Cashmere Hat

The cold weather and my new found post-college free time had me thinking about getting back into knitting. I wasn't quite sure what I wanted to make, so I just started looking at the yarns that we already had in our yarn stash and found this gorgeous pink cashmere. 

While looking for patterns I found this beautiful pattern on the Purl Bee blog that I absolutely loved and did not look too terribly hard! I love the Purl Bee blog- it is the blog for the knitting/sewing/craft store called Purl Soho in NYC. Coincidentally, we were taking a trip to NYC to visit my cousin Meghan this winter and a stop by Purl Soho was on the list of things to do, so I was extra motivated to start knitting!  

I ended up finishing my hat in the hotel in New York the night before we went to Purl Soho, and I was glad I did because it ended up being freezing cold and snowing that day! I was a little reticent to wear it out in the city as I have a history of loosing beloved homemade hats in New York cabs (to my defense I was much younger), but I was just extra careful and my hat has made it home safely and been put to good use during our chilly winter. 

That day we went to Purl Soho, and it was just as wonderful as I remember. I got an early Christmas gift of soft merino wool- which I will be using to make my next project- and had a lovely time just looking around at all of the different projects and yarns. We also had a lovely tea prior to going to Purl Soho at the Harney & Sons Tea Shop. It worked out perfectly because they were literally a block away from each other, and the tea was delicious. Harney & Sons was mostly a tea shop, but they had a small tea room in the back where we stopped in a had scones, tea, and macaroons, the perfect afternoon treat on a cold winter day. 

October 2, 2013

Butternut Squash Ravioli


Is there anything better than crisp fall weather and autumnal foods?! From apple crisp to pumpkin pie to a bowl of Mom's chili? Fall has definitely got me in the mood to make seasonal recipes and I have been trying my hand at a variety of homemade pasta recipes so when I found this Butternut Squash recipe on the 100 Days of Real Food blog I knew I had to give it a try. I adapted it a bit (mostly because I just wanted to use ingredients I hand). The blog is really neat, it explains how to cut out processed foods, etc. I don't know if I am committed to giving up processed foods completely, but I have really been trying to use more whole, unprocessed foods and cook with seasonal produce etc. 

Dough
  • 2 cups all purpose flour
  • 3 large eggs
  • a few teaspoons water (as needed for consistency) 

Filling 
  • 2 1/2 lbs butternut squash, cooked
  • 1 tablespoons melted butter
  • zest of 1 large orange
  • 1/2 cup mascarpone cheese (if you can't find it you can you cream cheese)
  • 1/3 cup parmesan cheese
  • 1/4 teaspoon ground cinnamon
  • pinch of nutmeg
  • salt and pepper, to taste  

Sauce

  • 1/2 cup butter
  • chopped pecans
  • dried cranberries or cherries 
Preheat your oven to 400 degrees. Cut the butternut squash lenghwise, remove seeds and place cut side down on a greased baking sheet or parchment paper on a baking sheet and cook until fork tender-- cooking time will vary depending on the size of the squash but anywhere from 30 min- 1 hour.  

Mix the flour and eggs together in a food processor or knead by hand (If the dough resembles little pebbles when you finish pulsing it, add water by the 1/2 teaspoon until it forms a ball). Once the dough starts to form a ball, turn out onto a floured surface and knead by hand until the dough is not sticky. Wrap the dough in plastic wrap and let rest for at least 30 minutes. 

While the dough is resting, make the filling by combining all of the filling ingredients. This can also be done a day in advance and refrigerated.

Roll out the dough either by hand or with a pasta machine, if using a pasta machine, setting #4 is a good thickness. Place the pasta sheets on floured baking sheets and fill with spoonfulls of filling, making sure to leave space in between each. Brush the space in between the filling with an egg wash (egg beaten with a bit of water) so that it is sure to stay sealed. Using a ravioli criper or a knife and then a fork to crimp the sides, cut and seal the raviolis. Bring a pot of salted water to a boil and boil raviolis until al dente, about 4 minutes. 

For the sauce: Melt 1/2 cup butter in a pan over medium heat until brown, add chopped pecans and either dried cranberries or cherries. Pour over raviolis and serve immediately. 


August 8, 2013

Salted Caramel Covered Marshmallows


These (and the ones that we dipped in chocolate, not pictured because they were all eaten before a photo could be taken) are probably the most time intensive thing I've made thus far. The process includes making homemade marshmallows, homemade salted caramels, then cutting each into strips and wrapping them into logs and then slicing them into the sizes you see above.

Here are the recipes for the respective steps. Separately, making the marshmallows and the caramel are not that difficult, you just have to be sure to follow the directions and be patient.

Homemade Marshmallows recipe from Ina Garten

3 packages unflavored gelatin
1 1/2 cups granulated sugar
1 cup light corn syrup
1/4 teaspoon kosher salt
1 tablespoon pure vanilla extract
Confectioners' sugar, for dusting

Combine the gelatin and 1/2 cup of cold water in the bowl of an electric mixer fitted with the whisk attachment and allow to sit while you make the syrup.

Meanwhile, combine the sugar, corn syrup, salt, and 1/2 cup water in a small saucepan and cook over medium heat until the sugar dissolves. Raise the heat to high and cook until the syrup reaches 240 degrees on a candy thermometer. Remove from the heat.

With the mixer on low speed, slowly pour the sugar syrup into the dissolved gelatin. Put the mixer on high speed and whip until the mixture is very thick, about 15 minutes. Add the vanilla and mix thoroughly.

With a sieve, generously dust an 8 by 12-inch nonmetal baking dish with confectioners' sugar. Pour the marshmallow mixture into the pan, smooth the top, and dust with more confectioners' sugar. Allow to stand uncovered overnight until it dries out.

Turn the marshmallows onto a board and cut them in squares. Dust them with more confectioners' sugar.


July 25, 2013

Pistachio Raspberry Cupcakes

I'll just start off by saying these are my absolute favorite cupcakes. And I've had my fair share of cupcakes over the years, we tend to make a habit out of planning trips around good places to eat. The cake is moist, buttery, sweet, and all around delicious and then you'll get a bite with a juicy raspberry and the silky cream cheese frosting and that puts it right over the edge it pure bliss.

Another reason these are so delicious is because they are a luxury. I don't make them very often because unfortunately they are a bit costly (both pistachios and raspberries are fairly expensive in terms of baking ingredients, but when raspberries are in season it's easier to get them on sale). Also, if you buy the pistachios at wholesale at places such as Costo or BJs they are less expensive too. 
   

This is a Martha Stewart recipe, which I like to pair with a cream cheese frosting 

  • 1 cup whole unsalted pistachios, plus 1/4 cup slivered or chopped 
  • 1 1/2 cups sugar
  • 1 teaspoon salt
  • 4 ounces (1 stick) unsalted butter, softened
  • 2 teaspoons pure vanilla extract
  • 4 large eggs
  • 1 cup all-purpose flour
  • 2 cups fresh raspberries


  1. Preheat oven to 375 degrees. Line standard muffin tins with paper liners. Process whole pistachios, sugar, and salt in a food processor until finely ground. Add butter, vanilla, and eggs, and process until smooth. Add flour, and pulse until just combined. 
    Divide batter among muffin cups, filling each halfway. Sprinkle with raspberries and slivered or chopped pistachios. Bake until firm and pulling away from liners, about 28 minutes. Let cool in tins on wire racks. Yields about 15-18 depending on the size. 
    Cream Cheese Frosting 
    • 8 ounces cream cheese, room temperature
    • 8 tablespoons (1 stick) unsalted butter, cut into pieces, room temperature
    • 1 cup confectioners' sugar
    • 1 teaspoon pure vanilla extract

    Cream the butter and cream cheese with a mixer. Add sugar a little at a time, mix until smooth. Add vanilla and stir to combine. 

    *I halved the recipe for the frosting when making the cupcakes because I only had one package of cream cheese and it provided plenty of frosting to spread of thin layer of frosting on the cupcakes. I don't like too much frosting on mine since the cupcakes themselves are already pretty sweet. 

July 24, 2013

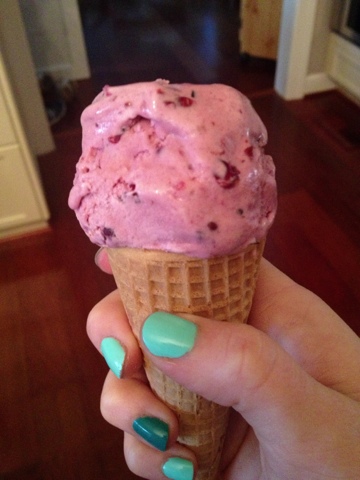
Mixed Berry Ice Cream

Ever since we were little kids we have made homemade ice cream. We have had one of the old fashioned ice cream makers that consists of a bucket and a core and churner for as long as I can remember and I do love it, however sometimes it is quite a production to get all the ice, rock salt and parts together. Because we wanted to get into ice cream making again, but without all the hassle, we purchased an ice cream bowl attachment for the KitchenAid, essentially it is a bowl that freezes in the freezer and a churner component that allows you to turn your KitchenAid into an ice cream maker! Once I actually figured out how it worked (thanks Corey for helping point out some important directions!) it has been really fun and easy to use.

For ice cream recipes I turned to our trusty Ben & Jerry's Ice Cream Book, again which we have had for as long as I can remember. In addition to having great recipes, it gives cool stories about how Ben & Jerry got their start. Did you know that they originally thought about opening a bagel shop but then found out the bagel machinery cost too much so turned to ice cream?! My undying love of Berry Berry Extraordinary thanks the fates of the universe for the cheap[er] start up costs of an ice cream business. 

My family has voted the Mixed Berry Ice Cream as the favorite of the ice creams that I have made so far (others being peach ice cream and blackberry sorbet). 

Most ice creams start out with a base and then you can pretty much add whatever you want to them. For this ice cream I started out with the traditional cream base and then added strawberries, blackberries, and blueberries -- hence the mixed berry!


Sweet Cream Base 

2 large eggs 
3/4 cup sugar
2 cups heavy whipping cream
1 cup milk

Whisk the eggs in a mixing bowl until light and fluffy, 1 to 2 minutes. Whisk in the sugar, a little at a time, until completely blended, about 1 minute more. Pour in the cream and milk and whisk to blend.

For the fruit: Put 2 cups of mixed berries (I used blackberries, strawberries, and blueberries), 1/3 cup sugar, and juice of 1/2 lemon in a bowl and refrigerate for 1 hour. Lightly pulse in a food processor until desired consistency, I chose to leave some chunks of fruit and not completely purée it. Add this to the Sweet Cream Base right before putting it into the ice cream maker. 

Freeze according to the specific ice cream maker's directions. 

July 22, 2013

Blackberry Sorbet


  • 2 1/2cups fresh blackberries pureed with 1/2 cup cold water until smooth
  • 1cup granulated sugar
  • 2tablespoons lemon juice from 1 large lemon
  • 1tablespoon vodka (I used unflavored, but feel free to experiment with various flavors, etc.) 

1. Combine berry puree, sugar, lemon juice, and alcohol in large bowl. Stir on and off for several minutes until sugar has dissolved. (Or, to speed chilling process in next step, combine ingredients in a metal bowl set over a larger bowl filled with ice water.) Rub finger along bottom of bowl to see if sugar has dissolved.

  1. 2. Pour mixture into small container. Seal and refrigerate until mixture is no more than 40 degrees. (If mixture has been stirred over a bowl of ice water, it may already be cold enough, and this step may be omitted.)
  2. 3. Pour chilled mixture into container of an ice cream machine and churn until frozen, about 20-30 minutes depending on your ice cream machine.
  3. 4. Scoop frozen sorbet into a container. Seal and transfer container to freezer for several hours to allow sorbet to firm up. (Sorbet can be kept frozen for up to 3 days.)

    The alcohol in the sorbet allows for a very creamy, smooth texture; however, the sorbet will never be very hard, even after freezing for several hours. This is a great sorbet, albeit very sweet, you could try and modify the sweetness by adding less sugar, just keep in mind that some of the sweetness will be reduced when freezing.  


Sweet Cherry Pie

Another successful Cooks Illustrated recipe! This Sweet Cherry Pie turned out great and was a hit at my house. 


  • Sweet Cherry Pie  
  • 2red plums, halved and pitted
  • 6cups (about 2 pounds) pitted sweet cherries or 6 cups pitted frozen cherries, halved (see note)
  • 1/2cup sugar (3 1/2 ounces)
  • 1/8teaspoon table salt
  • 1tablespoon juice from 1 lemon
  • 2teaspoons bourbon (optional)
  • 2tablespoons instant tapioca, ground (see note)
  • 1/8teaspoon ground cinnamon (optional)
  • 2tablespoons unsalted butter, cut into 1/4-inch pieces
  • 1large egg, lightly beaten with 1 teaspoon water
  1. Adjust oven rack to lowest position, place baking sheet on oven rack, and heat oven to 400 degrees. Process plums and 1 cup halved cherries in food processor until smooth, about 1 minute, scraping down sides of bowl as necessary. Strain puree through fine-mesh strainer into large bowl, pressing on solids to extract liquid; discard solids. Stir remaining halved cherries, sugar, salt, lemon juice, bourbon (if using), tapioca, and cinnamon (if using) into puree; let stand for 15 minutes.
  2. Transfer cherry mixture, including all juices, to dough-lined plate. Scatter butter pieces over fruit. Roll second disk of dough on generously floured work surface (up to ¼ cup) to 11-inch circle about 1/8 inch thick. Roll dough loosely around rolling pin and unroll over pie, leaving at least ½-inch overhang. Flute edges using thumb and forefinger or press with tines of fork to seal. Brush top and edges with egg mixture. With sharp knife, make 8 evenly spaced 1-inch-long vents in top crust. Freeze pie 20 minutes.
  3. Place pie on preheated baking sheet and bake 30 minutes. Reduce oven temperature to 350 degrees and continue to bake until juices bubble around the edges and crust is deep golden brown, 30 to 40 minutes longer.
  4. Transfer pie to wire rack; let cool to room temperature so juices have time to thicken, 2 to 3 hours. Cut into wedges and serve.

    Be aware that if you are not patient and wait until it is cool to serve it or it will not congeal and have the "typical" pie consistency. (We might have not been so patient and it was a bit hard to serve, but delicious nonetheless.)


More Pasta!

I love how something as simple as pasta can take on so much character. This recipe from Cooks Illustrated literally has three ingredients: all purpose flour, eggs, and water. It's great because we almost always have eggs and flour on hand in the kitchen so whenever we feel like making pasta its easy to whip up. The hard part is deciding what type oI have tried various ways of mixing the dough (entirely by hand, with a KitchenAid mixer, and with a food processor) and I think that the food processor is my favorite. 

2 cups (10 oz) all purpose flour
3 large eggs 
water
  1. 1. Pulse the flour in the workbowl of a food processor fitted with the metal blade to evenly distribute. Add the eggs; process until the dough forms a rough ball, about 30 seconds. (If the dough resembles small pebbles, add water, 1/2 teaspoon at a time; if the dough sticks to the side of the workbowl, add flour, 1 tablespoon at a time, and process until the dough forms a rough ball. See figures 1 through 3 below for tips on judging moisture level in dough.)
  2. 2. Turn the dough ball and small bits out onto a dry work surface; knead until the dough is smooth, 1 to 2 minutes. Cover with plastic wrap and set aside for at least 15 minutes and up to 2 hours to relax.
  3. 3. Using a pasta machine, roll out the dough. Lay the pasta out on floured baking sheets until ready to cook. 

    4. Bring a pot of water to a boil, add the pasta to the water and cook until al dente, only about 3-4 minutes. 


Here we decided to serve the pasta with zucchini, squash, and chicken, in a lemon sauce. I don't really have a recipe for this as we sort of made it up as we went, but it turned out delicious all the same.